How to Use Asana to Create an Editorial Calendar
A hand-holding guide with tons of pictures and examples.
I wrote over on Medium today about how I’ve just started using Asana—a digital project management tool—to manage my to do list. For life, but also for all of my writing (both blogging and fiction.)
I thought I’d expand on one aspect of how I’m using Asana here, just for you guys.
I’m experimenting with using Asana to create an editorial calendar.
(This post is very photo heavy and details exactly how to do each step. At the very bottom is a recap with a checklist of all the tasks so you can see them all at once.)
Full disclosure.
My regular practice is just open a new-story page on Medium and write. I keep an editorial calendar, but it’s more like “write every day” or “write on Write Already every Wednesday” than specific story ideas for each day of the week.
Even fuller disclosure: that’s more than a little nerve wracking some days.
I have a couple of methods for coming up with things to write about. I’ll share those with you next week. So I never actually feel like I don’t have anything to say. It’s just that sometimes I stare at my white screen for too long.
Sometimes it feels like this is it—this is the day I ran out of stuff to say.
Hello, Asana.
So, I’m working on making myself a real, useable editorial calendar. One where I schedule individual posts for actual days of the week.
For instance, I just added “methods for content idea generation” to next Wednesday. That way I don’t have to worry about forgetting that I just promised that to you.

My theory (and hope) is that my editorial calendar will grow and mature over time. Right now, it’s pretty basic. Because, like I said, I don’t usually think too much about what I’m going to write until I’m sitting down to write it.
But I want to change that. So, as ideas come to me, my plan is to add them to my Asana Editorial Calendar.
Here’s how to make your own (and how I put mine together.)
First, just head over to Asana and set up a free account.
Once your account is set up, create a new project by clicking the “+New” button in the right top corner, then choosing ‘project’ from the drop down.

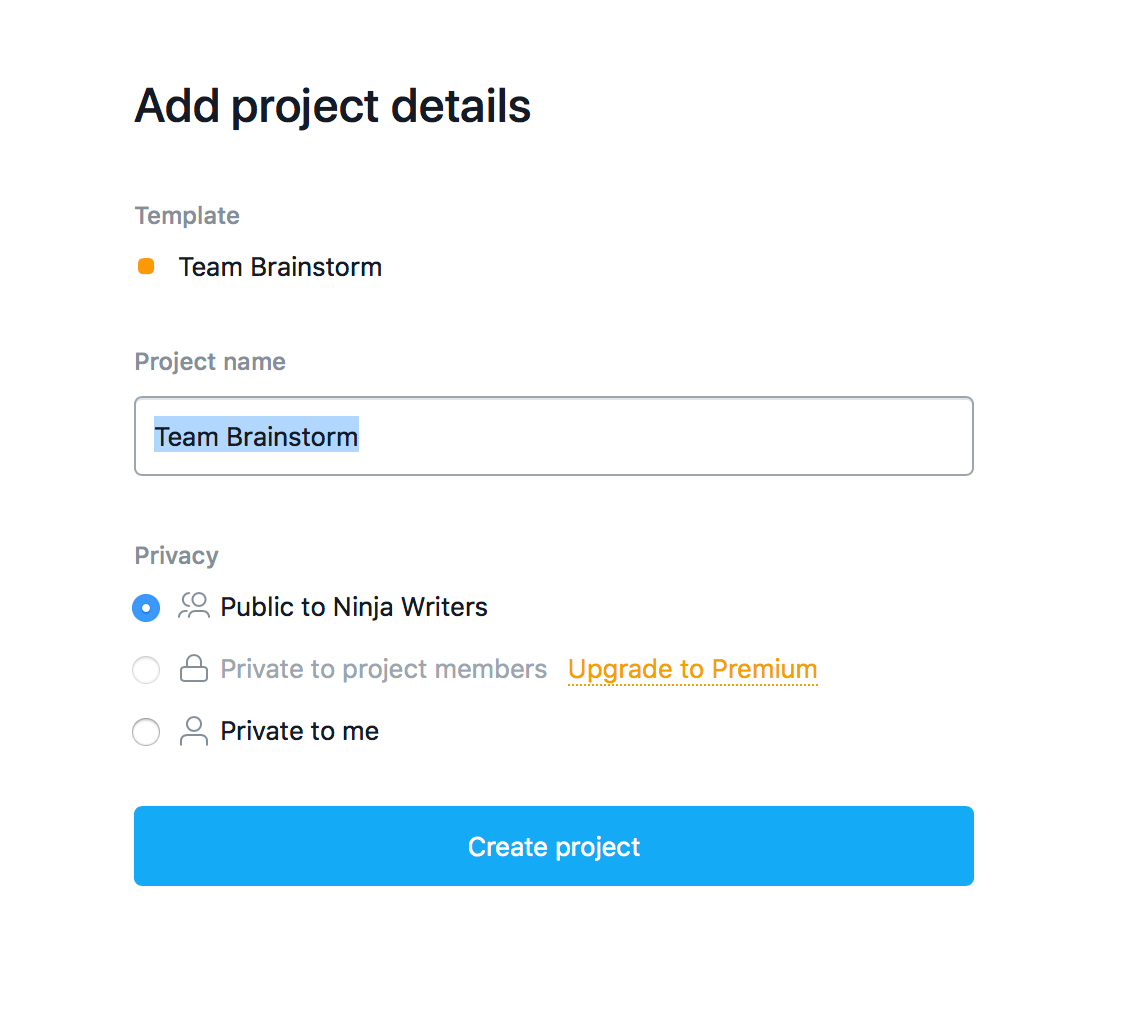
On the next screen, choose the ‘Team Brainstorm’ template.
Then click ‘Use Template.’ That’ll give you this screen:

Name your calendar. I just called mine ‘editorial calendar.’ Fancy, right?
Then click ‘create project.’
You’ll get this screen next. It’s a template that’s partially filled out. Each box under the + signs are ‘tasks.’

If you hover over each box—for instance the one that starts (Read Me)— you’ll see three little dots. Click that and you can erase that task.

If you click on the name for each list, you can rename it.

Rename your lists to reflect your needs. Here’s what mine looks like:

You could organize yours by topic. Or you could list each of the Medium publications you write for. If you have freelance clients, you could (and should) add them.
Once you have your columns named, click the + sign under each one to add an entry to your calendar. That will open a simple box that you just type into.

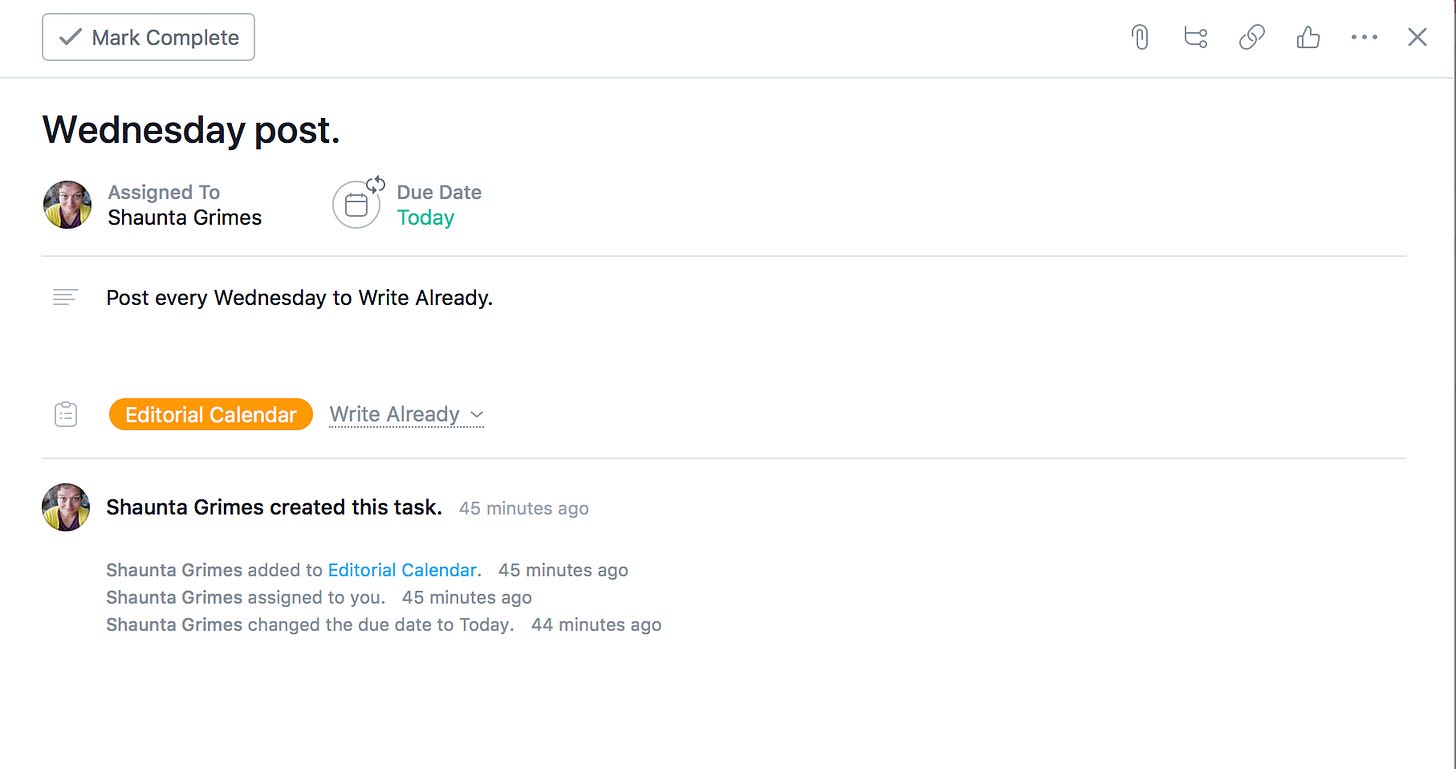
Once you’ve written your entry, you can click it to add more details. This is what you’ll see:

You can assign the story to someone. This is helpful if you have a team or maybe you’re running a publication with multiple writers.
You can write a little more about the story. Some notes about resources or an outline, maybe?
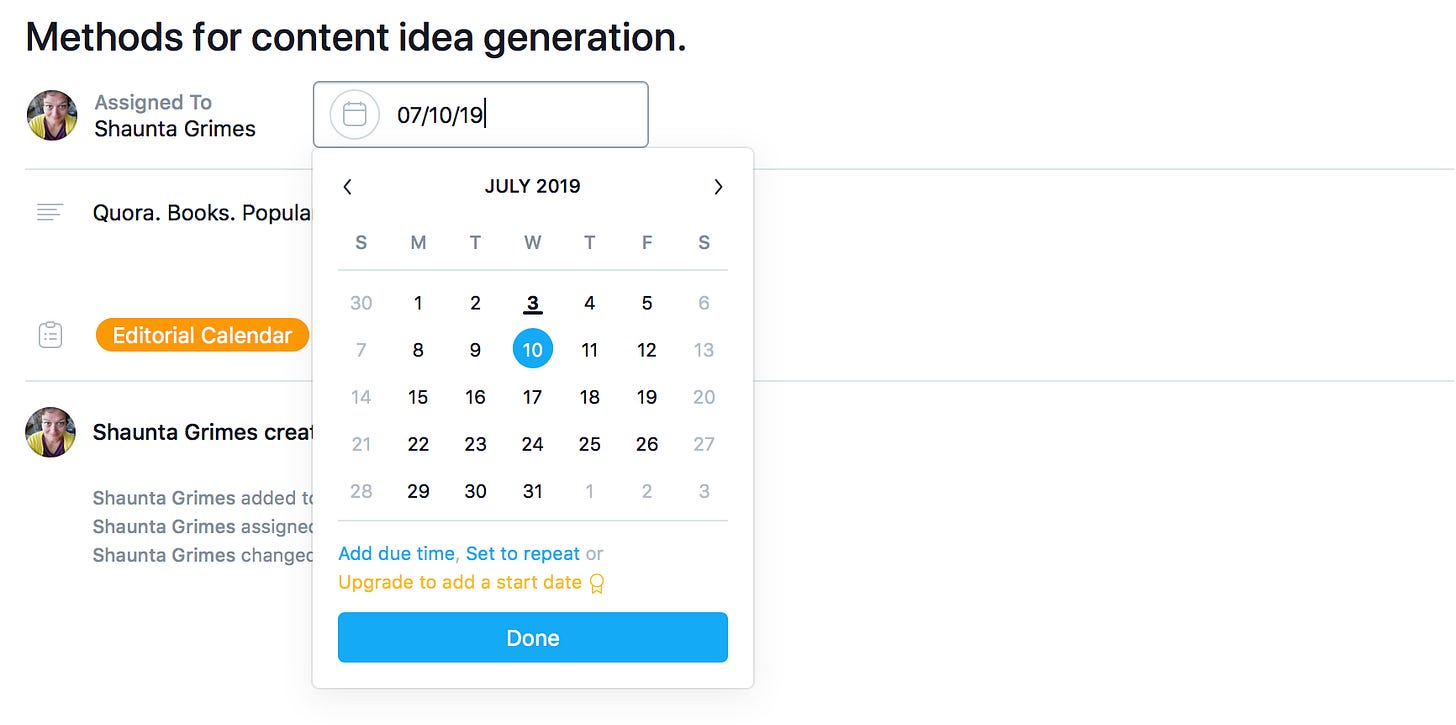
And you can add a due date. Just click on ‘due date’ and a calendar will pop up.

Pick the date that you want that story to publish. Or maybe the date that you want to have the draft finished by. That could be helpful if you’re writing ahead so you can publish if you’re on vacation, for instance.
You can set your story to repeat. For instance, I write a Monday newsletter for my email list. So I set that entry to repeat every week. You can choose a period repeat (every three days, for instance), daily, weekly, monthly, or yearly.

That’s it. Your story is on the calendar.
Now you can click ‘calendar’ on the top of the page to see an actual calendar view.
When you’re on this view, you can add items right into the calendar by clicking on the date. In this photo, you can see the task box on the 26th.

If you hover over the task, you’ll see a check mark you can click to let Asana know you finished that task (aka, wrote that post.) When you click it, the task goes gray and the check mark stays. You can see that on July third in the picture above.
A Recap
Wow. That was a lot. Here’s a list of just the steps, no pictures and stuff. If you don’t know how to do any of the steps, look up above for directions.
Sign up for Asana.
Create a new project using the ‘Team Brainstorm” template.
Erase the template tasks.
Rename the columns to suit your writing business.
Add tasks into each column.
Click on the task you just added to add more information and select a date.
You can make the task recurring, if that suits your needs.
Use the ‘calendar’ view to see your editorial calendar as an actual calendar.
Asana will send you an email every day with your daily tasks.
You can log into the app on your computer or phone to see what you have scheduled for today as well.
Here’s my secret weapon for sticking with whatever your thing is.
Shaunta Grimes is a writer and teacher. She is an out-of-place Nevadan living in Northwestern PA with her husband, three superstar kids, two dementia patients, a good friend, Alfred the cat, and a yellow rescue dog named Maybelline Scout. She’s on Twitter @shauntagrimes and is the author of Viral Nation and Rebel Nation and the upcoming novel The Astonishing Maybe. She is the original Ninja Writer.


